
 Pin
Pin
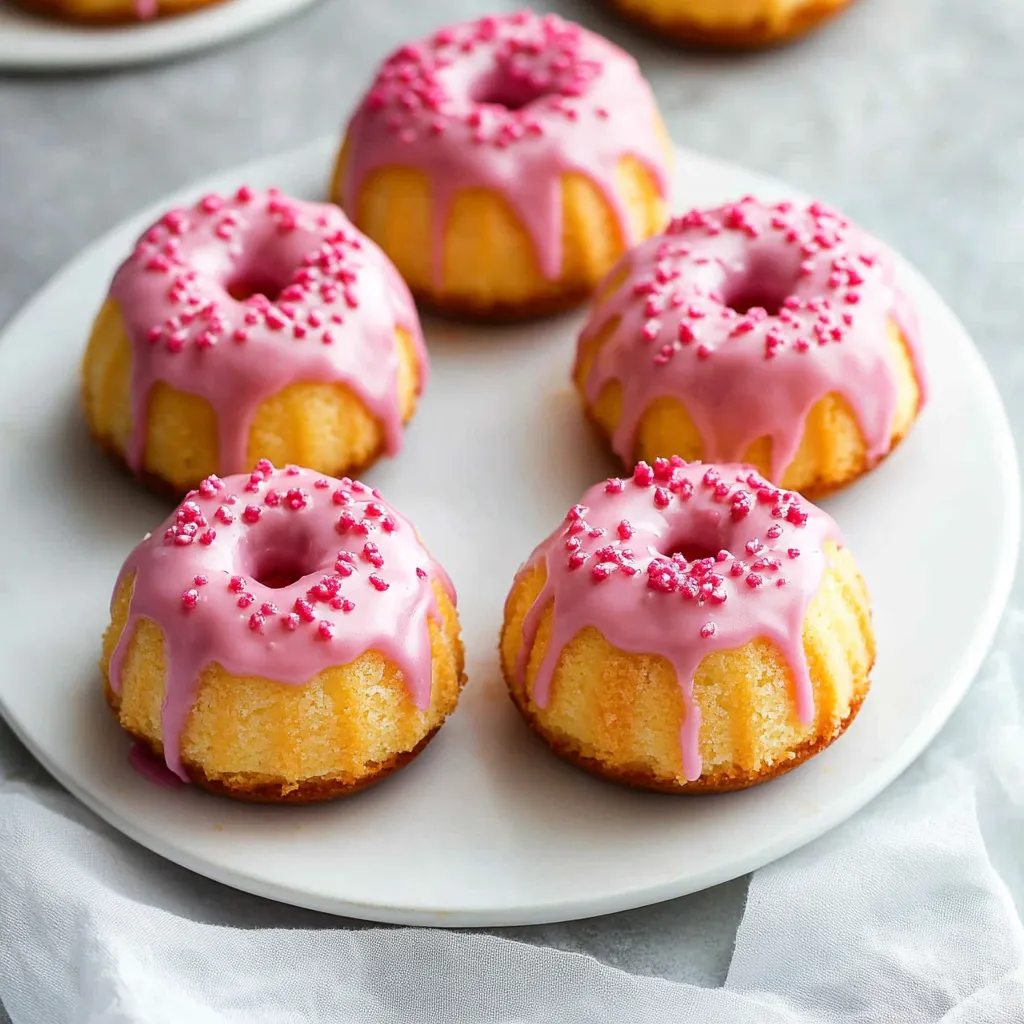
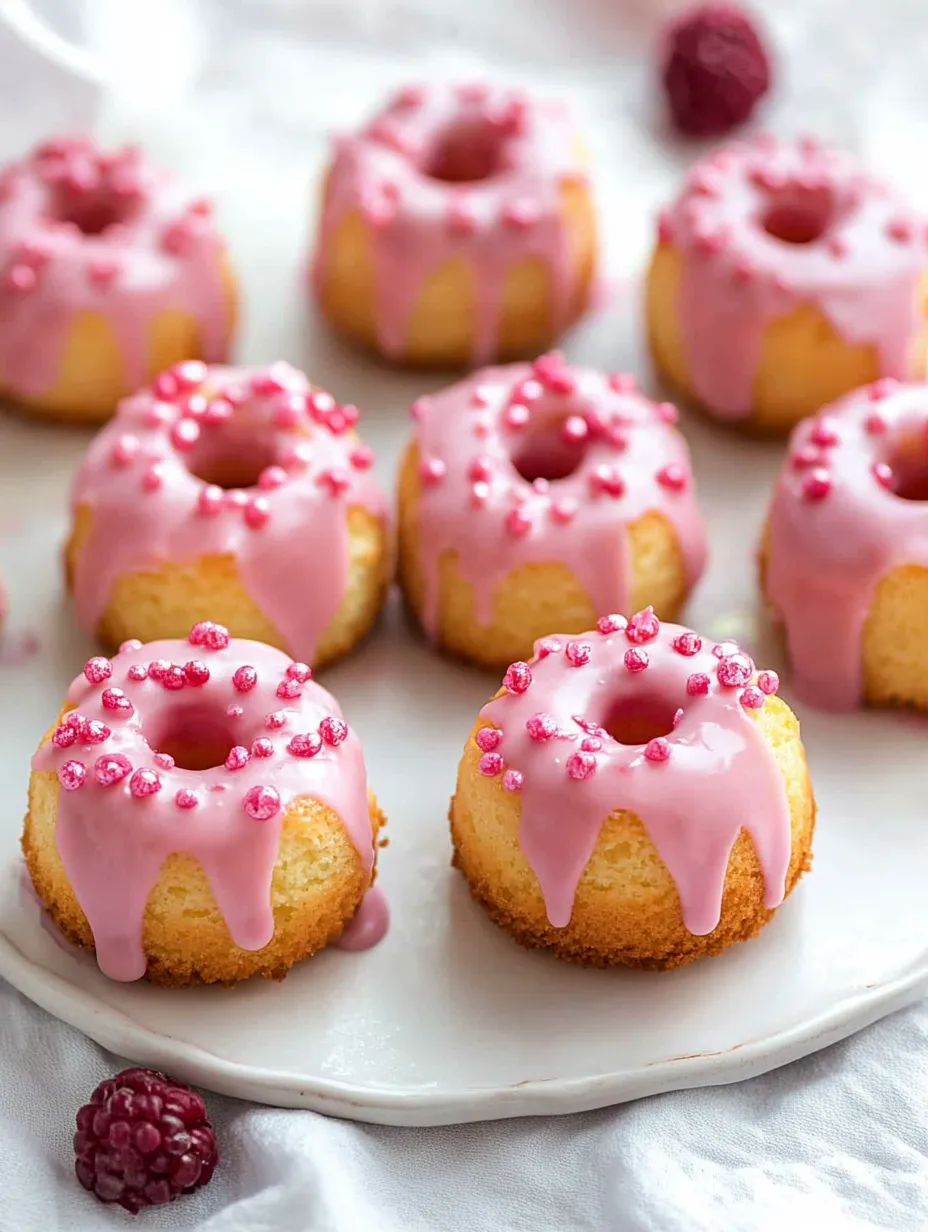
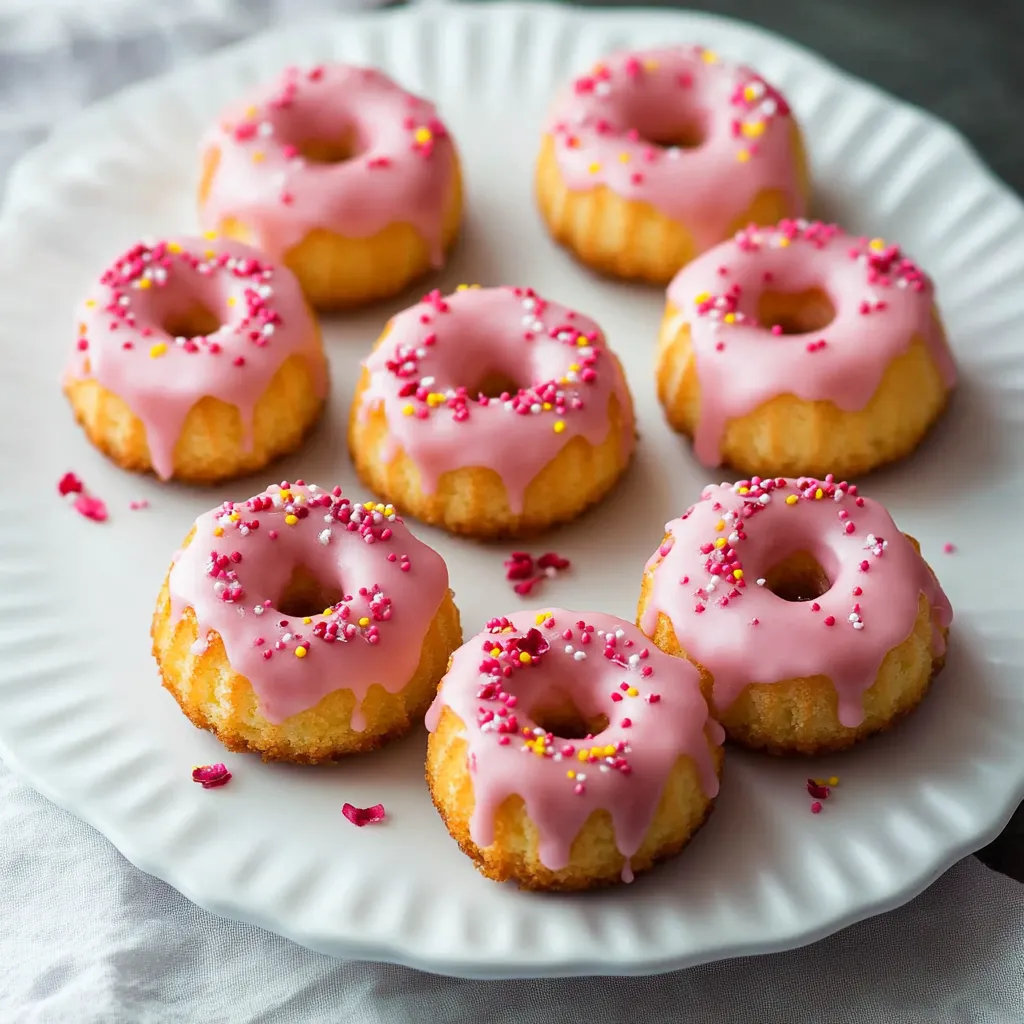
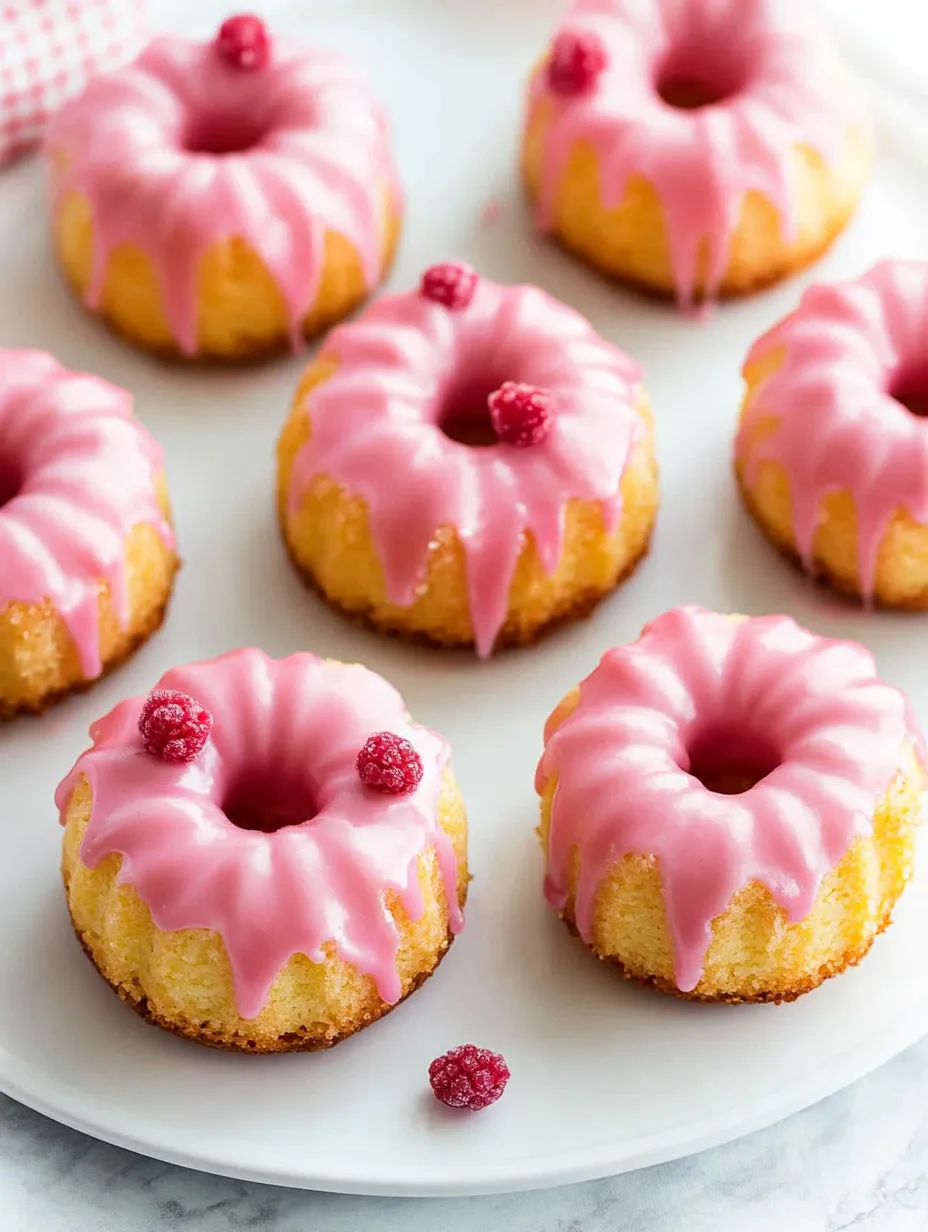
The perfect Valentine's Day dessert doesn't need to be elaborate to be enchanting. These Mini Vanilla Pound Cakes strike that delightful balance between classic and charming, each one a petite testament to buttery perfection. When you split one open, the tight, golden crumb reveals delicate specks of vanilla bean, while the raspberry glaze adds just the right touch of romantic pink and fruity brightness.
Last weekend, I brought these to a bridal shower and watched as guests' eyes lit up at the sight of these miniature beauties. The bride-to-be was particularly moved when she discovered each cake was perfectly sized to share with her fiancé over their morning coffee.
Essential Ingredients and Selection Tips
- Butter - European-style butter with higher fat content creates an exceptionally rich flavor. Leave it out for exactly 1 hour before baking for the perfect softness
- Sour Cream - Full-fat only; it's crucial for that velvety texture and helps activate the leavening
- Vanilla Bean - Look for pods that are plump and flexible, not brittle. Each tiny seed is a burst of intense flavor that makes these cakes special
- Eggs - Room temperature eggs incorporate better into the batter. I place mine in warm water for 10 minutes if I forget to take them out early
These ingredients might seem simple, but they work together like a well-rehearsed orchestra. After countless batches, I've learned that splurging on high-quality vanilla beans makes a noticeable difference in the final flavor.
Step-by-Step Instructions
- 1. Preparation Phase
- Begin by thoroughly greasing your mini Bundt pan - every nook and cranny needs attention. Even with non-stick pans, this extra insurance guarantees perfect release. Position your oven rack in the center and preheat to 350°F. The even heat distribution is crucial for uniform baking.
- 2. Creating the Base
- Start with room temperature butter and sugar in your mixing bowl. Beat them together until the mixture becomes noticeably lighter in both color and texture - about 3-4 minutes. This isn't just mixing; it's creating the foundation for your cake's texture.
- 3. Building the Batter
- Add eggs one at a time, allowing each to fully incorporate before adding the next. This patience ensures a smooth, stable emulsion. Scrape the bowl frequently - those butter bits hiding at the bottom need to join the party.
- 4. Incorporating Wet Ingredients
- Blend in your vanilla extract, vanilla bean seeds, and sour cream until just combined. The batter might look slightly curdled at this stage - don't worry, it'll smooth out when the flour joins in.
- 5. Final Mix
- Gradually add your dry ingredients, mixing on low speed just until combined. Over-mixing here is your enemy - stop as soon as the last flour streak disappears. The batter should be thick and luxurious.
- 6. Filling and Baking
- Fill each cavity about 2/3 full - these cakes need room to rise. Tap the pan gently on the counter to release any air bubbles. Bake for 20-25 minutes, or until a toothpick emerges with just a few moist crumbs.
As someone who's baked hundreds of pound cakes, I can't stress enough how important proper pan preparation is. My grandmother taught me to brush every crevice with melted butter, then dust with flour. Her method hasn't failed me yet.
The Art of the Perfect Rise
The beauty of these mini cakes lies in their even rise. Unlike regular cakes, pound cakes need a slower, steadier climb to achieve that characteristic dense crumb. Resist the urge to open the oven door during baking - each peek lets out precious heat.
Mastering the Glaze
The raspberry glaze isn't just a pretty finish - it's an essential flavor component. Fresh raspberries create a more vibrant color and taste than artificial coloring ever could. I puree and strain them to remove seeds, ensuring a silky-smooth finish that drapes beautifully over each ridge.
Decorating Details
While these cakes are stunning with just a simple glaze, special occasions might call for more elaboration. Try adding a sprinkle of edible pearl dust for shimmer, or pipe tiny royal icing hearts for Valentine's Day. The key is to let the cake's beautiful shape guide your decoration choices.
Storage Success
These little cakes actually improve with a day's rest, as the flavors deepen and meld. Store them under a cake dome at room temperature for up to 3 days, or freeze unglazed cakes for up to 3 months.
The Science of Moisture Balance
Understanding the moisture dynamics in these mini cakes is crucial for perfection. Unlike their larger counterparts, these petite versions can dry out more quickly due to their increased surface area. The sour cream plays a vital role here - its fat content and acidity tenderize the gluten while adding moisture that stays locked in during baking. Through testing dozens of variations, I've discovered that a ratio of 1/4 cup sour cream to 1 cup of flour creates that elusive balance between richness and structure.
Exploring Pan Alternatives
While mini Bundt pans create that classic fluted design, this recipe adapts beautifully to other small forms. Mini loaf pans yield charming rectangular cakes perfect for gifting, while muffin tins create elegant individual portions. Just remember to adjust baking times - smaller portions may need only 15-18 minutes, while a single loaf requires about 45-50 minutes. I've found that dark metal pans produce a slightly crispier exterior, while light-colored pans give a more delicate crust.
Flavor Variations
The vanilla bean base opens up endless possibilities for customization. A teaspoon of citrus zest adds bright notes perfect for spring, while a swirl of cinnamon-sugar creates a cozy winter treat. My personal favorite is adding 1/4 teaspoon of almond extract - it enhances the butter's richness while adding subtle complexity.
Making Ahead and Storage Solutions
These cakes are fantastic candidates for make-ahead desserts. Unglazed cakes can be wrapped individually in plastic wrap, then foil, and frozen for up to 3 months. Thaw them overnight in the refrigerator, then bring to room temperature before glazing. The glaze can also be made ahead and stored in an airtight container in the refrigerator for up to a week - just warm it slightly and whisk before using.
Chef's Essential Tips
- Test your oven's temperature with an external thermometer - even a 25°F variance can affect these delicate cakes
- When adding vanilla beans, run your knife at a 45-degree angle for the most efficient seed extraction
- For picture-perfect glazing, elevate your cakes on a wire rack over parchment paper before pouring
Final Thoughts
I'll never forget the first time I served these at a garden party - the way each guest's face lit up at the sight of their own personal cake made all the careful preparation worthwhile. That's the magic of miniature desserts - they make everyone feel special.
Recipe FAQs
- → Can I make these ahead?
- Yes, can freeze unfrosted cakes up to 3 months
- → No mini bundt pan?
- Can use mini loaf pans or one 9x5 inch loaf pan
- → No vanilla bean?
- Add extra 1/2 teaspoon vanilla extract instead
- → Why room temperature ingredients?
- Ensures even mixing and best texture
- → Can I change the icing color?
- Use different berries or food coloring for various pink shades